Track 3 · Building your plans
Service discounts explained
The ten fixed discount categories and how to set them.
Alongside included services, every plan carries a fixed set of ten discount categories. You can't add or remove categories — but you set a discount percentage and terms for each.
Where to find it
Go to Settings → Membership Builder, then open an existing plan (or Create New Plan) and click the Benefits tab. The discount categories sit on the right-hand side, under Discounts on services and Products — next to the Included Services table on the left.
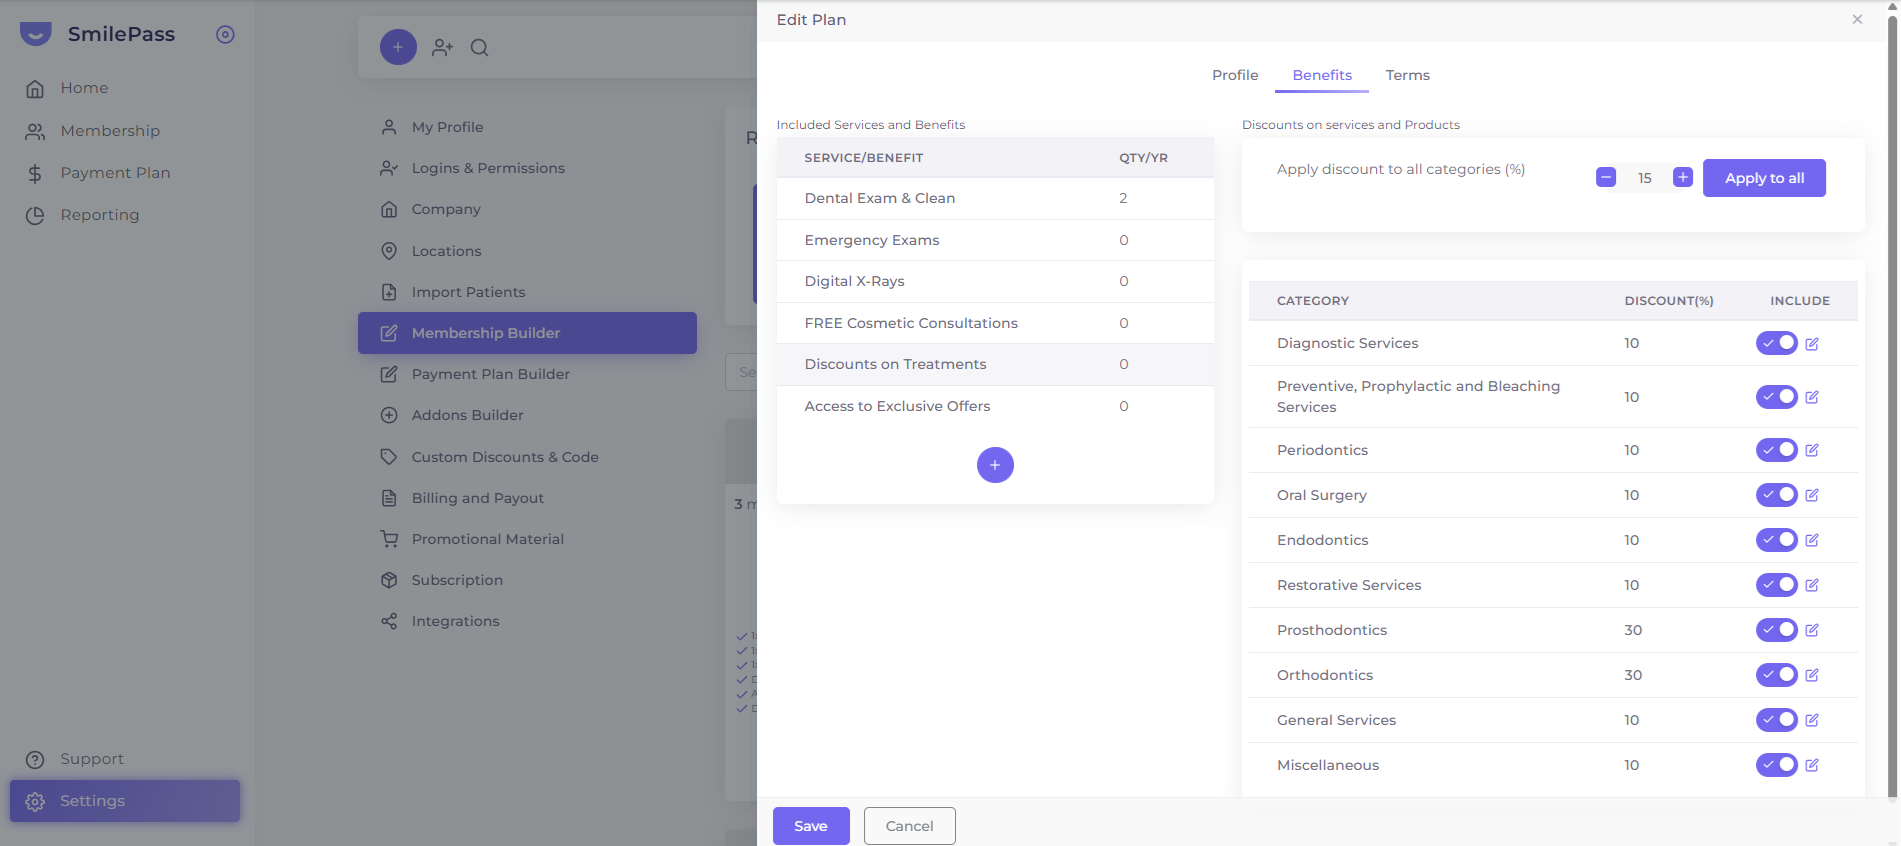
The ten categories (always in this order)
- Diagnostic Services
- Preventive, Prophylactic and Bleaching Services
- Periodontics
- Oral Surgery
- Endodontics
- Restorative Services
- Prosthodontics
- Orthodontics
- General Services
- Miscellaneous
How it works
- Each category takes a discount % (default
0) and an optional terms note. Type a percentage in the Apply discount to all categories field and press Apply to all to set one rate across every category at once, then adjust individual rows as needed (in the example above most sit at 10%, while Prosthodontics and Orthodontics are bumped to 30%). - The INCLUDE toggle on each row controls whether that category is part of the discount scheme at all — switch it off to leave a category out.
- Use the small edit (pencil) icon beside a category to set terms specific to that group.
- A category left at
0%shows no discount for that group on the contract. - Many clinics apply a flat percentage across all ten (e.g. 15% on everything); others mix per category.
Next step
Editing a live plan →
Plan edits are retroactive — how to change terms safely.